
Moodle Tutorials: Creating Assignments
- Linking Your Course to Moodle
- Navigating in Moodle
- Beginning of Semester Checklist
- Setting up the Layout of Your Course Site
- Editing Your Moodle Profile
- Copying Course Materials from Another Site
- Using Meta Link (combining enrollments from multiple course sections into one site)
- Quick-Start Video Guides for Moodle 4.2
- Adding an Announcement
- Uploading a File
- Creating and Editing Folders
- Managing Groups: Creating Groups and assigning student to them
- Adding Text and Images to Your Course Home Page
- Adding a Web Link
- Hiding and Revealing Items
- End-of-Term Checklist
- Adding a user to your course
- Bulk Update Dates
- Setting up a Forum
- Enabling Groups in a Forum
- Setting up Whole Forum Grading
Creating Assignments
- Grading Assignments
- Using Rubrics for Assignments
- Creating a Quiz
- Quiz Settings
- Adding Questions to a Quiz
- Using the Question Bank
- Adding Safe Exam Browser
- Adding a User Override
- Adding a New Column (Grade Item)
- Rearranging Columns (Grade Items)
- Entering and Editing Grades
- Creating Categories in the Grade Book
- Adding Extra Credit
- Exporting Grades Into Excel Spreadsheet
- Importing Grades from an Excel Spreadsheet
- Accessing Moodle
- Taking a Quiz in Moodle
- Uploading an Assignment to Moodle
- Participating in Discussion Forums
- Viewing Grades on Moodle
- Safe Exam Browser
- Adding H5P Interactive Content
- Embedding Google Drive Videos
- Embedding YouTube Videos
- Embedding Box Videos
The assignment feature in Moodle makes it very easy for students to submit their assignment files to instructors. It includes excellent features that make it easy for instructors to receive, manage, and return those files back to students along with the feedback.
1. In the upper right-hand corner, click the "Edit Mode" on the top right:

2. Next click Add an activity or Resource on the course front page within a topic or a week field: Select Assignment .

3. Add a title in the assignment name box and add the assignment details in the description box:
4. Select appropriate for your assignment values in the Availability block. These settings will determine when students will be able to submit the assignment, due dates, etc. You can find the full description of each component for Moodle under Assignment Settings .
5. Next block called Submission Settings controls how students will submit the assignment: whether they submit an independent file or type their assignment directly into Moodle, etc. Full description of Submission Settings for Moodle.
6. The block called Feedback Types controls how instructors will give feedback to students. Full description of Feedback Settings for Moodle.
7. Determine how the assignment will be graded in Grade . Full description of Grade Settings for Moodle.
8. The last two blocks, Common Module Settings and Restrict Access , give you the ability to turn on group submission and create some restrictions for students accessing the assignment. Full descriptions of Common Module Settings and Restrict Access are available.
9. Once all appropriate settings are selected and set, click "Save and Return to course."
- << Previous: Assignments
- Next: Grading Assignments >>
- Last Updated: Sep 16, 2024 1:43 PM
- URL: https://pacificu.libguides.com/moodle
Copyright © Pacific University, all rights reserved
2043 College Way, Forest Grove, Oregon, 97116
[email protected] | 503-352-1400 | Staff Directory
Niall McNulty
A Step-by-Step Guide to Creating Your First Moodle Course
Introduction
Welcome to our comprehensive guide on setting up your first course on Moodle . As an innovative Learning Management System ( LMS ), Moodle offers a rich and versatile platform for course creation. Whether you are an educator seeking to bring your curriculum to life or a corporate trainer looking to upskill your team, Moodle’s vast array of features will cater to your specific needs.
In this guide, we’ll journey through Moodle’s course creation process, shedding light on its core functionalities and practical applications. From initiating a course and setting up your gradebook to managing your course post-launch, we will demystify each step, ensuring you have a clear roadmap for your Moodle exploration.
So, are you ready to dive in and craft your first Moodle course? Let’s get started on this exciting journey together, equipping you with the knowledge you need to leverage Moodle’s potential to the fullest.
Navigating Moodle
Before we dive into course creation, let’s familiarise ourselves with Moodle’s layout and critical functionalities. Think of Moodle as a digital campus where each feature and tool uniquely facilitates a vibrant learning environment.
Upon logging into Moodle, you’ll land on the dashboard, your interface into the Moodle universe. Here, you can see your courses, upcoming activities, and messages. Your dashboard can be customised to best suit your needs, offering quick access to the information and tools that are most relevant to you.
Now, let’s navigate where our course will come to life – the course creation area. Start by clicking ‘Site home’ on the navigation drawer on the left of your screen. This area is like your Moodle control room, providing a birds-eye view of all the courses you can access.
Find and click the ‘Create a new course’ button, typically located at the bottom of the ‘Site home’ page. If you don’t see this option, you may need to confirm that you have the necessary permissions to create a course. Once you’ve accessed the course creation area, you’re ready to begin crafting your first Moodle course.
However, before we jump into that, take some time to familiarise yourself with the rest of the Moodle interface. On the left, you’ll find the navigation drawer, providing quick access to different areas of the Moodle site. You’ll find links to your dashboard, calendar, private files, and more here. At the top, you’ll see the navigation bar, which helps you trace your steps back to previous pages.
Remember, Moodle is an exceptionally customisable platform that adapts to your needs. The more comfortable you navigate its interface, the more effectively you can leverage its various features. So, take a few moments to explore and customise your Moodle environment, laying the groundwork for seamless course creation.
Our next section takes our first step into course creation, initiating a new course and setting its basic parameters. As we move forward, remember that each step brings us closer to a transformative learning experience for your future students.
Setting Up Your First Course
Having familiarised ourselves with the Moodle environment, we’re now ready to begin creating your first course. This stage is about laying the foundations and defining the basic parameters that will shape your course’s structure and identity.
Start by clicking the ‘Create a new course’ button. You’ll be taken to a page titled ‘Add a new course,’ where you’ll fill out the basic details of your course. Let’s go through these fields together.
General Settings
First, you’ll see a section titled ‘General.’ This is where you’ll define your course’s basic details:
- Course full name: This is the official name of your course, visible to everyone. Make it descriptive but concise, allowing potential learners to grasp what your course is about quickly.
- Course short name: This is a brief identifier for your course, typically used in navigation and course listings. It might be an abbreviation or an internal code. Keep it simple and unique.
- Course summary: This is your opportunity to provide a more detailed course description. Highlight what learners can expect, the topics you’ll cover, and any prerequisites or target audience.
- Course start and end dates: These dates define the duration of your course. They’re essential if you’re running a course with a fixed timeline or if it is part of a learning program with sequential courses.
Once you’ve filled out the general settings, it’s time to set your course’s visibility.
Course Visibility
Under the section ‘Course visibility,’ you’ll find two options: ‘Show’ and ‘Hide.’ Selecting ‘Show’ makes your course available to students, while ‘Hide’ keeps it invisible. This setting is handy when you’re still working on your course and don’t want students to access it yet.
Now that you’ve defined your course’s basic settings, it’s time to select the course format to determine its structure.
Selecting Course Format
Moodle offers several course formats that dictate how your course content is organised. Under the ‘Course format’ section, you can select from formats such as ‘Topics,’ ‘Weekly,’ ‘Social,’ and others.
- The ‘Topics’ format organises your course by thematic sections. This format is ideal for courses where each topic is distinct, and there’s no strict chronological order to follow.
- The ‘Weekly’ format organises your course by week, with each week’s content in a separate section. This option is great for courses with a clear timeline and sequential content.
- The ‘Social’ format bases your course around a single forum and is suitable for highly conversational or discussion-based courses.
Select the format that best suits your course objectives, keeping in mind the nature of your content and the preferred learning path for your students.
Once you’ve selected the course format, you can define the number of sections for your course under ‘Number of sections.’ If you’re unsure, you can always add or remove sections later.
Congratulations! You’ve now laid the groundwork for your first Moodle course. Click ‘Save and display,’ and you’ll be taken to your new course page, a blank canvas awaiting your educational masterpiece.
In our next section, we’ll dive into setting up your gradebook, a vital tool for assessing learner progress and success. As you continue this journey, remember: every step you take brings you closer to delivering an engaging, impactful learning experience.
Setting Up the Gradebook
Now that we’ve laid the foundations for our Moodle course let’s turn our attention to a crucial aspect of any learning journey: assessment . Within Moodle, the guidebook serves as your hub for all things related to grading and evaluation. It’s where you’ll define your grading methods, track learner progress, and provide feedback.
The first thing to understand is that the Moodle gradebook automatically includes any graded activities you add to your course, such as quizzes or assignments. Each activity gets its own ‘grade item,’ forming the building blocks of your grade book.
Let’s walk through the process of setting up your grade book.
Accessing the Gradebook
To begin, click on ‘Grades’ in the course administration block. This will take you to the Grader report, your main overview of students and their grades.
Creating Grading Categories
Before we add individual grade items, we should organise our grade book by creating grading categories. Categories allow you to group related grade items and represent things like units, chapters, or types of assignments.
To add a category, click on ‘Setup’ and then ‘Categories and items.’ Here, you can add a new category, give it a name, and set its aggregation method, determining how grades in this category will be calculated. Once you’ve added a category, it will appear in your Grader report.
Adding Grade Items
Now that we have our categories, we can start adding grade items. As mentioned earlier, any graded activity you add to your course will automatically create a grade item. However, you can also add manual grade items for offline activities.
To add a manual grade item, navigate to ‘Categories and items’ again, and click ‘Add grade item.’ You can name the item, assign it to a category, and set its maximum and minimum grades.
Setting Up a Grading Scale
Moodle allows you to grade items using points, percentages, letters, or a custom scale. The scale you choose will depend on your assessment strategy and the nature of the activity. For example, a quiz might best suit points, while a discussion forum might benefit from a custom scale like ‘Excellent/Good/Average/Poor.’
To create a custom scale, go to ‘Scales’ in the course administration block, and click ‘Add a new scale.’ You can then list your scale items, separated by commas, and give your scale a name.
Remember, the gradebook is not just a tool for assigning grades. It’s a powerful way to track student progress, identify areas of difficulty, and provide timely, constructive feedback. It’s integral to the learning experience you’re creating.
In the next section, we’ll move from planning and organisation to action, exploring how to add content and activities to your course. Each piece of content you add will bring your course to life, forming a rich tapestry of learning opportunities for your students.
Adding Course Content
With your course’s foundations and grading system now in place, it’s time to add content and build the learning journey for your students. This stage of course creation is where Moodle truly shines, offering diverse options to help you deliver an engaging, varied, and effective learning experience.
To get started, navigate to your course homepage and turn on the editing mode by clicking the ‘Turn editing on’ button at the top right corner of your course page. Once editing is enabled, you’ll notice that each section of your course now has an ‘Add an activity or resource’ link.
Adding Resources
Resources in Moodle are content items typically used to present information. They can include files, pages, URLs, and books. Clicking on the ‘Add an activity or resource’ link will open a pop-up window that lists all available resources and activities.
- Files: You can upload any file type to your course, such as PDFs, Word Documents, Spreadsheets, or PowerPoints. Your students can download these files.
- Pages: A page resource creates a link to a screen that displays the content created by the teacher. This can include text, images, multimedia, and embedded code.
- URLs: You can add a URL to direct students to an external website. This can be used to link to resources, videos, or online documents.
- Books: The book resource allows you to create multi-page resources with a book-like format. This is particularly useful for lengthy passages of information that can be broken down into chapters.
Adding Activities
Beyond static resources, Moodle also allows you to add interactive activities. These are tools that allow for interaction and collaboration among students and teachers.
- Assignments: Assignments allow you to collect student work, review it and provide feedback, including grades. The work students submit is visible only to the teacher and not to the other students.
- Forums: Forums allow asynchronous communication, i.e., communication that doesn’t happen in real time. They can be used in various ways – for course announcements, class discussions, peer support, etc.
- Quizzes: Quizzes are a powerful assessment tool which can consist of a large variety of question types, including multiple-choice, true-false, and short-answer questions.
- Glossaries: Glossaries allow students and teachers to create and maintain a list of definitions, like a dictionary.
Adding course content is a dynamic process, and you’ll likely want to move, edit, or hide activities and resources as your course evolves. Moodle’s flexible design supports this, allowing you to continually refine your course to serve your student’s learning journey best.
The following section will explore managing your course post-launch, discussing how to interact with students, monitor progress, and adjust based on feedback and performance.
Enhancing Course Appearance
An engaging and intuitive course design is essential for keeping learners interested and on track in the online learning landscape. Here’s how you can make your Moodle course visually appealing and user-friendly.
Course Format
Moodle offers various course formats that determine the layout of your course. You can select a format in the ‘Course format’ section under ‘Edit settings’ in ‘Course administration.’
- Topics Format: This flexible format organises your course by topic. Each topic can contain activities and resources.
- Weekly Format: This format manages your course by week, organising activities and resources each week.
- Social Format: This format is centred around a single forum and is best for more discussion-based courses.
Moodle themes control the visual layout and styling of your site. Themes can be changed at the site level or can be overridden for individual courses or users.
Blocks can be added to your page’s left, right, or centre. They can be things like a calendar, the latest news, or a course completion status.
Enrolling Students
Once your course is set up and looking great, it’s time to enrol your students. Moodle offers several methods for student enrollment.
Manual Enrollment
As a teacher, you can manually enrol students in your course. Under ‘Course administration’, click ‘Users’, then ‘Enrolled users’. Here you can add students by clicking the ‘Enroll users’ button.
Self-Enrollment
You can also allow students to enrol themselves. This can be done by adding the ‘self-enrollment’ method in the ‘Enrollment methods’ section under ‘Course administration’.
Cohort Enrollment
Cohorts are site-wide or category-wide groups. If you have a predefined cohort, you can simultaneously enrol the whole cohort in a course.
Guest Access
For more open courses, you might allow guest access. This will enable users to view your course content without being enrolled.
Your Moodle course is now ready for students to start their learning journey. Remember, as you gain more experience with Moodle, you’ll find numerous ways to refine your courses and enhance the learning experiences you provide.
Managing Your Course Post-Launch
Launching your course is a significant milestone, but your Moodle journey is far from over. The true magic of online learning lies in its dynamic nature – in the ongoing interactions with students, the real-time tracking of progress, and the ability to continually refine your course for optimal learner outcomes. This section’ll discuss how to manage your course after it goes live.
Facilitating Interaction
As an instructor, your role in facilitating student engagement is paramount. Moodle provides several tools to help you foster a lively, interactive learning environment.
- Forums: Beyond their use for announcements and discussions, forums can be a platform for student questions and peer-to-peer learning. Be active in these spaces, answering queries, providing insights, and encouraging dialogue.
- Messaging: Moodle’s messaging feature allows for direct communication with students. Use it to provide personalised feedback, clarify instructions, or address individual concerns.
- Comments: Many activities and resources in Moodle allow for comments. These can be used to gather student feedback, clarify content, or facilitate discussion.
Monitoring Progress
Effective course management involves monitoring student progress closely and intervening when necessary. Here’s how Moodle can assist:
- Activity Completion: Moodle allows you to set completion conditions for activities and resources (like viewing a resource or submitting an assignment). This provides a clear roadmap for students and will enable you to track progress at a glance.
- Gradebook: As discussed earlier, the gradebook is your go-to tool for monitoring academic progress. Review this to identify struggling students and adjust your teaching strategies as needed.
- Logs and Reports: Moodle provides detailed logs and reports that record every action in your course. These can help you understand student behaviour, such as how often they access the course, which resources they use, and when they submit assignments.
Refining Your Course
Your first iteration of any course is unlikely to be perfect. Moodle encourages continual improvement through its flexible design and robust feedback tools.
- Feedback and Survey Activities: These activities allow you to gather student feedback on your course. Use them to identify what’s working, what’s not, and where you can improve.
- Analytics: Moodle provides predictive models and analytics to help you identify students at risk of not meeting their learning objectives. This can inform your teaching strategies and help you enhance your course design for future cohorts.
Remember, managing a course post-launch is as essential as its initial setup. It’s about staying connected with your learners, keeping your finger on the pulse of their progress, and being responsive to their needs. As you navigate this phase, take comfort that you’re not alone – Moodle is there to support you every step of the way. Your dedication to providing the best learning experience makes education genuinely transformative.
Course Completion and Beyond
Once your learners have navigated your course, it’s time to wrap things up and start thinking about what comes next. From final assessments and course completions to future improvements and new courses, this last stage of the journey is as important as the first. This section explores how Moodle can assist with this process.
Assessing and Grading
By now, your learners have engaged with your course content and completed various activities. It’s time to assess their understanding and provide feedback.
- Gradebook: Utilise your gradebook to review all your students’ grades for each activity. This not only gives you a snapshot of your student’s performance but also enables you to give valuable feedback.
- Final Assessments: You may have a final exam or project, depending on your course design. Use Moodle’s wide range of activity modules, like quizzes or assignments, to conduct these final assessments.
Course Completion
Moodle has a built-in course completion tracking system that clearly indicates progress.
- Setting Up Course Completion: Navigate to ‘Course Completion’ under ‘Course Administration.’ Here, you can set the criteria that learners must meet to complete the course, such as finishing specific activities, reaching a particular grade, or spending a specified amount of time in the course.
- Tracking Course Completion: Once you’ve set up course completion, you can track your learners’ progress in the ‘Course Completion’ report.
Certificates and Badges
Consider issuing certificates or badges upon course completion to recognise your learners’ achievements and give them a sense of accomplishment.
- Certificates: The Custom Certificate plugin can be used to design and issue printable certificates based on predefined criteria.
- Badges: Badges are a great way to gamify your course and recognise learner achievements throughout their journey, not just at the end. Moodle supports both course and site badges.
Reflecting and Improving
With one course under your belt, it’s time to reflect on the experience, gather feedback, and consider improvements for next time.
- Surveys and Feedback: Don’t forget to ask your learners for feedback. Their insights can help you understand what worked, what didn’t, and where there’s room for improvement.
- Reviewing Logs and Reports: Review the logs and reports for your course. These can provide information about how learners interacted with the course and help you make data-informed decisions about future improvements.
The end of a course is just the beginning of a new cycle of course design. Each course you create allows you to learn, improve, and give your students an even better learning experience. As you reflect on your experience and plan for the future, remember that Moodle is a dynamic platform that grows with you.
Exploring Advanced Moodle Features
You’ve created and managed your first course, but this is just the tip of the Moodle iceberg. As a versatile and powerful LMS, Moodle has many advanced features designed to enhance your online teaching and learning experience further. Let’s explore some of these capabilities that can take your Moodle mastery to the next level.
Groups and Groupings
Moodle allows you to group students, which can be particularly useful for large classes or group work activities.
- Groups: You can create groups within your course under the ‘Groups’ section in ‘Course Administration.’ Students in the same group can work together on assignments, participate in the same forum discussions, and so on.
- Groupings: Groupings are a collection of groups. This allows you to assign a particular activity (or a set of activities) to groups rather than to all participants or one specific group.
Competency-Based Education
Moodle supports competency-based education, an approach focused on the mastery of specific skills or knowledge areas.
- Competencies: These can be defined at the site level and linked to specific courses. Each competency can be rated on a learning plan, providing clear indicators of a learner’s progress.
- Learning Plans: These are sets of competencies a learner must master. They can be individualised based on a learner’s specific needs or goals.
Mobile Learning
Moodle’s mobile app allows learning to happen anywhere, at any time. The Moodle Mobile app can be downloaded for free and customised to match your branding.
- Offline Access: Students can download course content for offline access, which can be particularly useful for learners with limited internet access.
- Notifications: The app supports instant notifications so learners can be immediately notified of course updates, forum posts, or incoming messages.
Integration with Other Systems
Moodle can be integrated with various other systems, expanding its capabilities even further.
- Plugins: Moodle’s open-source nature means numerous plugins have been developed to add functionality. These range from attendance tracking to plagiarism detection tools.
- External Tools: You can link to and from different web applications, like Google Apps or Microsoft Office 365, using the LTI (Learning Tools Interoperability) standard.
- Learning Analytics : Moodle can be integrated with learning analytics tools to understand learner behaviour and outcomes better.
Your Moodle journey is one of constant discovery and learning. There’s always more to explore, whether organising learners into groups, implementing competency-based learning, taking your course mobile, or integrating with other systems. As you grow as an educator, so will your knowledge and understanding of Moodle’s vast capabilities. Happy Moodling!
Leave a Reply Cancel reply
- LEaD events
- IT Self Service Portal
Create Moodle Assignment guide
- Get Started - Moodle Assignment
About Assignment
Create moodle assignment activity, availability, submission types, feedback types and submission settings, group assignment submission settings, notifications, common module settings & save, restrict access and activity completion settings.
- Create Assignment with Similarity Report
- Create Anonymous Assignment
- Create Anonymous Assignment with Similarity Report
- Create Timed Moodle Assignment
- Create Group Assignment
- Create Group Assignment with Similarity Check
- Create Anonymous Group Assignment
- Create and define Moodle Rubric from scratch
- Create Moodle Rubric from template
- Create and define new Marking guide
- Create Marking guide from template
- In person Moodle Assignment - settings for summative exam
- Assignment Go-live Checklist
- Moodle Assignment FAQ
Related guidance
This page provides an overview of how to create a Moodle assignment where each student submits their coursework individually.
Some things to consider in the settings for assignments:
- Anonymous submissions are not enabled.
- Turnitin is not enabled so no Similarity Report is produced.
- Time limit is not set, so students can begin working on the assignment as early or late as assignment settings allow.
Screencast: Create an individual assignment
This screencast demonstrates how to create an individual assignment in Moodle 4.
- Turn Edit Mode on.
- Open the relevant section. Select Add an activity or resource . Select Assignment from the Activities tab.
- In the General settings, write a meaningful Assignment name . This is the name that will be displayed on the module page and also in the gradebook.
- In Description , provide clear instructions to your students about the assignment. Consider adding a link to the student educational technology guidance.
- Check Display Description on module page to display the description beneath the assignment activity on the module page. If unchecked, the Description will only display when a student opens the assignment.
- Do not use Activity Instructions , as these will only display to students after they have opened the assignment (usually at the point of submission). This setting should only be used for timed Moodle assignments.
- If required, in Additional files , upload any files you would like to attach to this assignment (e.g. assignment cover sheet or example submissions). Download links for the files will be displayed on the assignment page under the Description.
- Moodle guidance for students
- In the Availability section, set the Allow submissions from date to indicate from when students will be able to submit their coursework. This is enabled by default.
- Set the Due date to match the assignment deadline. This date displays on the module page it is added to the Moodle Calendar and the students' Timeline block.
- Check the box next to Enable to set a Cut-off date . This is the final date and time when coursework can be submitted. Any submissions added after the Due date will be marked as late. Once the Cut-off date has passed, the submit button will not display on the assignment.
- Disable or update the Remind me to grade by date. This appears in Timeline and Upcoming events block for staff enrolled on a module to remind them of grading deadlines.
- Do not use Time Limit . This feature is for setting timed assignments.
- In Submission types , select the box to indicate if the submission will be online text or whether students will upload one or more files.
- If Online text submissions are enabled, students type rich text directly into an editor field for their submission. Markers can comment on, and edit students' text directly. Tick the Enable box to set a word limit. Set the maximum number of words that each student will be allowed to submit.
- Note: This is also the maximum number of feedback files that you can attach to each individual student when providing feedback. For example, if you want a student to submit one file but want to upload two feedback files then select three files.
- The maximum submission size defaults to the maximum upload limit for Moodle of 400MB . This default can be decreased if required. Please note: If you have Turnitin enabled on Moodle assignments that Turnitin's upload limit is 100MB .
- The lecturer can specify the types of file the students may upload to the assignment. The file types may be added with their file extension, such as .png and mp3, or else as image/png and audio/mp3.
- Accepted file types can be restricted by entering a semicolon-separated list of mimetypes, for example: 'video/mp4; audio/mp3; image/png; image/jpeg'. You may also limit to extensions by including the dot, for example '.png; .jpg'.
- If the file types have been restricted, then when students attempt to submit the assignment, they will see a message telling them which files are accepted.
- Leaving the field blank will allow all file types.
Feedback types controls how you can provide feedback. In most cases, you will not need to change these settings unless you have an online text submission.
- Set Comment inline to Yes for online text submissions.

Submission settings provide additional requirements for students to confirm prior to submitting their coursework.
- We recommend that Require students to click the submit button stays at the default No to facilitate students re-submitting up to the Due date.
- The setting Require that students accept the submission statement will be enabled by default on assignments. Do not change this setting as it is important that students understand what is required of them in regards to academic integrity prior to submitting an assignment.

- In the Group assignment settings, leave Students submit in groups set to No for individual assignments.

- If you want all Lecturers and Programme Administrators on a module to be notified via email of late submissions change Notify graders about late submissions to Yes .
- The Default setting for Notify students is Yes . Do not change this setting as it controls the generation of an email to students on release of grades and feedback.

- In the Grade settings, select the type of grade and the grading method. The most common settings are point and simple direct grading .
- For advanced grading methods - Rubrics and Marking records - select the links below.
- You can choose to Hide grader identity from students . This option might be required if Programme administrators are uploading feedback received from lecturers.
- Use Marking workflow is an optional workflow that requires grades to go through a series of stages before they're released to students.
- Create Marking Guide
- From the Common module settings , you can set Availability to Show or Hide on course page .
- You do not need to change the Group mode .
- Select Save and return to module .
You can use the Restrict access settings to control the availability of content and activities based on one or more conditions, including date and group.
Activity completion allows you to set completion criteria for a specific activity or resource.
Activities or resources with a completion criteria display a circle next to them in the Module index. The circle turns green (and is filled in) when the student meet the criteria. On the main module page, a tick and the word "done" appears against the item when the student meets the criteria. This helps students manage their progress on a module and staff can easily review student engagement and progress against key activities.
You can combine Restrict access and Activity completion to provide structured pathways through your module.
Apply the settings
- Open the activity or resource.
- Select Settings from the contextual navigation menu above the module name. This opens the activity settings.
- Change the settings required.
- Select Save and return to module to save any changes made.
- Manage your content guide
- << Previous: Get Started - Moodle Assignment
- Next: Create Assignment with Similarity Report >>
- Last Updated: Aug 21, 2024 1:34 PM
- URL: https://city-uk-ett.libguides.com/staff/moodle/assignment

Moodle help faster than you can drink a cup of coffee
Use Groups with an Assignment
How can we help.
The assignment activity has specialized group settings to help facilitate collaborative work.
Before configuring groups in an assignment, make sure to create groups . If you are using groups in more than one assignment you may also want to create a grouping .
- Open the assignment you want to add groups to
- Click Edit settings from the “Assignment administration” menu.
- In the "Group submissions settings" section, set "Students submit in groups" to Yes to enable group submissions.
- Set "Require group to make submission" to Yes if you don't want to allow students not in a group to be able to submit (they will see a message reading: "You're not a member of any group; please contact your teacher").
- The "Require all group members submit" field will become available if the "Require students click submit button" field (in the "Submission settings" section") is set to Yes . If both of these are enabled, the assignment will not be counted as submitted until all members of the group have visited the assignment and clicked the submit button. This is useful if multiple students need to upload contributions. When one student has submitted, the other members of the group will be able to see who still has to submit.
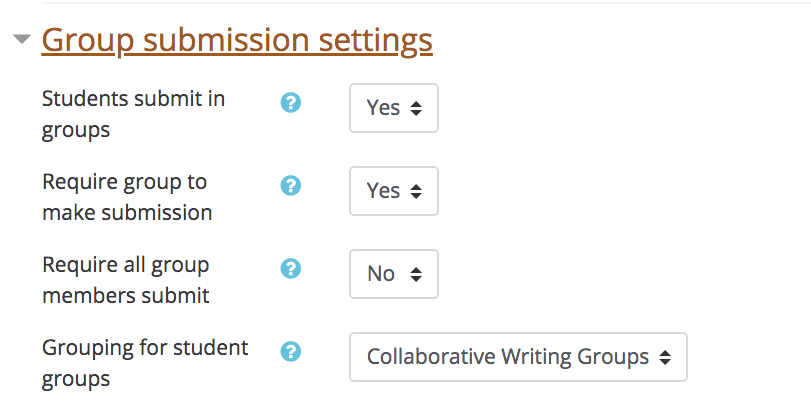
- Use the "Grouping for student groups" field if you are using groups in more than one activity in Moodle. For example, you may have one set of groups for a collaborative project and another set for discussions forums. See the Create a Grouping guide for details on setting up groupings.
- Click Save and display or Save and return to course .
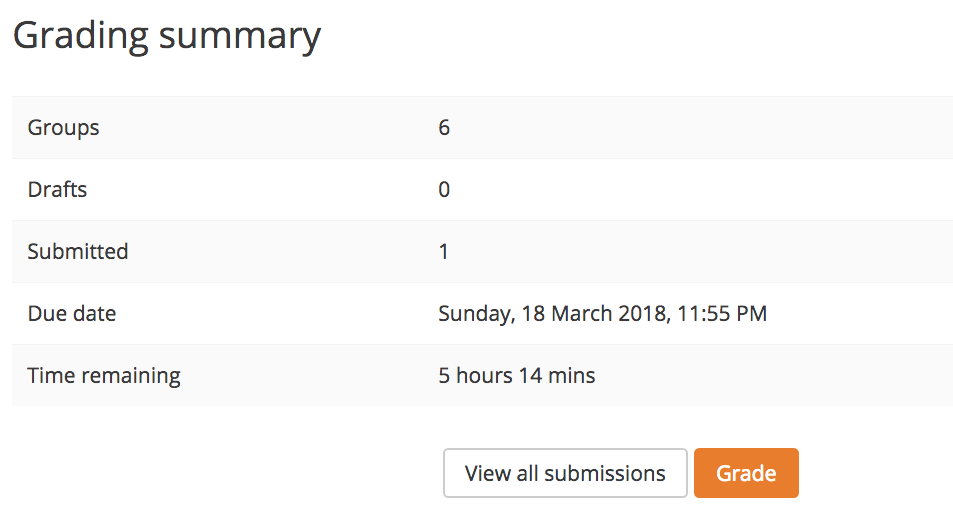
- When you open the assignment, you will see Moodle is only expecting submissions for each group, rather than for each student.
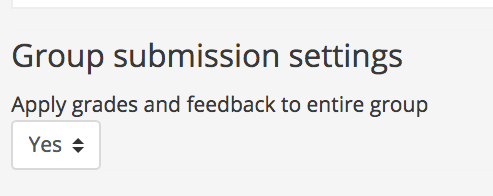
- When grading submissions, you will see an option to "Apply grades and feedback to entire group." If you leave this set to its default Yes , all members of the group will automatically receive the same grades and feedback.
- Request Info
- Academic Support
- Admission and Aid
- Student Engagement
- News and Events
- MyBCC Login
- Apply for Free!
- Request Information
How to Submit an Upload File Assignment in Moodle
Knowledge Base
- Search BCC's Knowledge Base
- BCC Technology
- Microsoft Office and Teams
- General Tips and Questions
- Help Request Form
Many classes at BCC, especially online classes, will require you to submit your student work electronically through our Moodle Learning Management System. Submitting work is easy, the steps below will show how.
Note: Make sure you are logged into your Moodle course and have navigated to the assignment before beginning these instructions. If you need help logging into your Moodle course, please see our article on How to Log Into Moodle .

- The Assignment screen will appear showing instructions and your Submission status (date submitted, grade, etc.) for this assignment. Read the assignment instructions as each assignment may be different and you don't want to miss important information from your professor.
- Open a word-processing program such as Word, type your assignment as your professor instructed, and save it to your computer.
Note: If you are submitting the assignment late the " Add submission " button may not appear as some instructors do not accept late assignments. If this is the case contact your instructor to discuss next steps.

- Click on Upload a file , then click Browse .

Note: Keep going! Your work is not submitted quite yet!
You may click the Edit submission button to add or replace uploaded files before finalizing.

Note: Once you click "Continue" you will not be able to make any more changes.

Search the Knowledge Base:
Contact us and online help.
Sometimes we all need a little assistance, especially with technology.
Online Help Request Form Monday – Friday: 8 a.m. – 4 p.m.
Monday – Thursday: 4 – 7 p.m. (when evening classes are in session) Phone: 413-499-4660, ext. 6501
BCC Student Technology Support Email: [email protected] Phone: 413-236-2166
BCC IT Help Desk Email: [email protected] Phone: 413-236-3004, or ext. 3004 on campus
Note: The Digital Commons and BCC IT Help Desk can only directly support college owned equipment and software. Limited support is provided to personally owned devices such as laptops, cell phones and tablets.
Make it your BCC
- Apply Today
- Request Program Info
- Give a Gift
Improvements for assignments in Moodle 3.3 make grading and management easier!
You’ve asked and we’ve listened!
In a much-requested feature, teachers can now have more control over the types of files accepted in assignments, which can help make grading and management much easier.
The file submission options include any readable types or can be specific to an assignment submission requirement.

Now, what happens when a student attempts to submit an assignment in a different file type?
Well, Moodle will provide them with a warning note to say that their file type is not accepted and to try again with the accepted format.

Teachers enjoy the ability to have more control over assignment submissions and choose which files your students can upload with this new feature in Moodle 3.3.
Watch how it all works in our explanatory video below.
- Download Moodle 3.3 or contact a Moodle Partner for upgrading assistance
- Download the Moodle 3.3 assignment file type restrictions explainer poster
- Read our Moodle 3.3 release notes
Subscribe to Moodle news
First Name*:
Last Name*:
Afghanistan Albania Algeria American Samoa Andorra Angola Anguilla Antarctica Antigua and Barbuda Argentina Armenia Aruba Australia Austria Azerbaijan Bahamas Bahrain Bangladesh Barbados Belarus Belgium Belize Benin Bermuda Bhutan Bolivia Bonaire, Sint Eustatius, and Saba Bosnia and Herzegovina Botswana Bouvet Island Brazil British Indian Ocean Territory British Virgin Islands Brunei Bulgaria Burkina Faso Burundi Cabo Verde Cambodia Cameroon Canada Cayman Islands Central African Republic Chad Chile China Christmas Island Cocos (Keeling) Islands Colombia Comoros Congo Republic Cook Islands Costa Rica Croatia Cuba Curaçao Cyprus Czechia DR Congo Denmark Djibouti Dominica Dominican Republic Ecuador Egypt El Salvador Equatorial Guinea Eritrea Estonia Eswatini Ethiopia Falkland Islands Faroe Islands Fiji Finland France French Guiana French Polynesia French Southern Territories Gabon Gambia Georgia Germany Ghana Gibraltar Greece Greenland Grenada Guadeloupe Guam Guatemala Guernsey Guinea Guinea-Bissau Guyana Haiti Heard Island and McDonald Islands Honduras Hong Kong Hungary Iceland India Indonesia Iran Iraq Ireland Isle of Man Israel Italy Ivory Coast Jamaica Japan Jersey Jordan Kazakhstan Kenya Kiribati Kosovo Kuwait Kyrgyzstan Laos Latvia Lebanon Lesotho Liberia Libya Liechtenstein Lithuania Luxembourg Macao Madagascar Malawi Malaysia Maldives Mali Malta Marshall Islands Martinique Mauritania Mauritius Mayotte Mexico Micronesia Moldova Monaco Mongolia Montenegro Montserrat Morocco Mozambique Myanmar Namibia Nauru Nepal Netherlands New Caledonia New Zealand Nicaragua Niger Nigeria Niue Norfolk Island North Korea North Macedonia Northern Mariana Islands Norway Oman Pakistan Palau Palestine Panama Papua New Guinea Paraguay Peru Philippines Pitcairn Islands Poland Portugal Puerto Rico Qatar Romania Russia Rwanda Réunion Saint Barthélemy Saint Helena Saint Lucia Saint Martin Saint Pierre and Miquelon Samoa San Marino Saudi Arabia Senegal Serbia Seychelles Sierra Leone Singapore Sint Maarten Slovakia Slovenia Solomon Islands Somalia South Africa South Georgia and South Sandwich Islands South Korea South Sudan Spain Sri Lanka St Kitts and Nevis St Vincent and Grenadines Sudan Suriname Svalbard and Jan Mayen Sweden Switzerland Syria São Tomé and Príncipe Taiwan Tajikistan Tanzania Thailand Timor-Leste Togo Tokelau Tonga Trinidad and Tobago Tunisia Turkey Turkmenistan Turks and Caicos Islands Tuvalu U.S. Minor Outlying Islands U.S. Virgin Islands Uganda Ukraine United Arab Emirates United Kingdom United States Uruguay Uzbekistan Vanuatu Vatican City Venezuela Vietnam Wallis and Futuna Western Sahara Yemen Zambia Zimbabwe Åland
If you want more information about Moodle, its software products and services, recommendations and promotions subscribe to Moodle's monthly newsletter. You can always unsubscribe if you change your mind.

Register for Moodle Moot 2024

The power of templates and reporting in Moodle LMS with Mark Glynn

MoodleMoot Italia 2024: Why Viterbo is the place to be for educators

Connecting Latin America’s EdTech leaders: Join the LATAM Moodle Partners at MoodleMoot Global 2024
EA Sports FC 25: Tactics Guide (How To Make & Switch Tactics)

Your changes have been saved
Email is sent
Email has already been sent
Please verify your email address.
You’ve reached your account maximum for followed topics.
EA Sports FC 25: How to Get Coins Quickly in Ultimate Team
How to spot a walkout in ea sports fc 25, how to complete fiendish sbc in ea sports fc 25, quick links, tactics in ea sports fc 25, explained, how to switch tactics in ea sports fc 25, how to import and generate codes in ea sports fc 25.
The Tactics in EA Sports FC 25 is a robust renovation that implements great changes to the gameplay. Compared to the previous installment, players have more variety inside and outside the pitch because of the new mechanics.
For example, you can create a formation that will hoard all your players in the middle of the pitch fighting for the ball. You can rotate players in unusual ways that don’t even make sense. All that creates the freedom to experiment and implement the best Tactics in EA Sports FC 25 .

Coins are quite important in EA Sports FC 25, as they are the only currency that can be used to buy players from the Transfer Market.
Starting from Tactical Preset, you can choose between three ready presets or create your own from scratch. The build-up style helps you set the tempo of your team's attacking mindset. Short passing is for patient build-up where your players will roam around the ball instead of making runs. The counter-build-up style encourages players to make runs once they constantly have possession. As for balanced , you’re basically putting your faith in AI to perform well and know what to do in every situation, which is a good bargain in EA Sports FC 25 . You can also optimize your defensive approach to decide how much pressure you want on your opponent.
You can use the Tactical Summary at the bottom of the screen to analyze your Tactics since it showcases the results of your creation. The tactical summary will always show you three tactical strengths alongside three tactical weaknesses. So, don’t be bothered by the constant availability of weaknesses and focus on escaping the ones you don’t want.
Player Roles

After going through the basics, it’s time for the most important part of creating your Tactics in EA Sports FC 25 . Setting your players’ roles is an essential part of any game plan, since that will determine how they’re going to move with and without the ball. There’s an incredible amount of choices to make when setting players’ roles in EA Sports FC 25 . From setting your RB to perform as a CDM to having your ST operate as a box-to-box CM, it seems like you can set your players to play exactly how you want them to.
However, be careful of putting players outside their positions as that will make them underperform in that specific role . Players will always perform better when they have the plus sign next to the role you’re giving them. It becomes even better if they have two plus signs, indicating they’re world-class at that position.

Spotting high-rated players is tricky. Find out how to spot a walkout in EA Sports FC 25 in this guide containing everything there is to know.
Player roles and Tactics in FC 25 add another layer on top of players’ chemistry when making your team. On top of matching players based on their nationality and their league, you also have to find players that fulfill the role you want to implement in your game plan. For example, if you want a holding midfielder and your team is mostly players who play in the Premier League, you’ll most probably have to find a holding midfielder from that same league.
Assignments

Player Assignments are not something new to EA Sports FC , but there are new demands you can assign your players to fulfill in FC 25 . The small change is you can choose left and right short free-kick takers . However, all the big changes to Assignments revolve around corners, where you can assign any three players in your team to receive the ball during corners . Starting from target player Assignment, it only works on offensive corners, while near and back post Assignments work on both defensive and offensive corners.
You can create up to five Tactics in EA Sports FC 25 and change between them during matches. Press the left button to open the My Tactics menu and all your Tactics will appear there . Additionally, even if you set your players' focus when creating your Tactics, you can still change them in-game by pressing the left button to open the Tactical Focus menu . This menu has the default, defending, and attacking choices to help your team transition between all three focuses without you creating Tactics for each one.

To use codes for Custom Tactics in EA Sports FC 25 , enter the Team Management menu and find the Use Code option. From there, you can use other people’s Tactics by copying the code they provide. To generate your own code, press Edit Tactic on the Tactics you want to share and press Save Changes without changing anything. The game will immediately generate a code that you can read on the top-left of your screen. That code will never change for this Tactic; it will only be invisible until you take the same steps again to see it.

EA Sports FC 25

Documentation
Note: You are currently viewing documentation for Moodle 2.2. Up-to-date documentation for the latest stable version is available here: Assignment module .
Assignment module
- Managing activities
- External tool
The assignment module allows teachers to collect work from students, review it and provide feedback including grades. The work a student submits is visible only to the teacher and not to other students.

- Assignment settings
- Using Assignment
- Assignment FAQ
Students can submit any digital content (files), including, for example, word-processed documents, spreadsheets, images, audio and video clips. Assignments don't necessarily have to consist of file uploads. Alternatively, teachers can ask students to type directly into Moodle using an online text assignment. There is also an offline activity assignment which can be used to remind students of 'real-world' assignments they need to complete and to record grades in Moodle for activities that don't have an online component.
Assignment types
There are 4 types of assignments:
- Workshop module allows peer to peer evaluations
- Using Moodle single file upload vs. advanced uploading forum discussion
- Activity modules
IMAGES
VIDEO
COMMENTS
Set up an assignment allowing online text submission and get students to use the Moodle media icon to add video/sound/image files. You want students to answer a series of questions on a video/sound file/image. Investigate the Quiz module. Assignments are really just for a single question. You want to grade work students have done offline
Assignment name. Give your assignment a name (e.g. "Report on Topic Content"). The name entered here will be the name that learners see in the course content area. Learners will click on this name to view the details of the assignment and, if applicable, submit their work.
Go to grades>full view and at the bottom click on the "add grade item" button. Type your points in maximum grade field and you can have something worth more than 100. Only drawback is that it doesn't show up in the topic outline, only the grade book. Average of ratings: -.
Moodle Assignment: assessment with marking guides In this type of grading, the teacher defines a series of criteria and assigns a maximum amount of marking points to each. When assessing learners' assignments, the teachers provide both a numerical mark and a comment for each of the criteria. For this type of grading, you can make the criteria ...
1. In the upper right-hand corner, click the "Edit Mode" on the top right: 2. Next click Add an activity or Resource on the course front page within a topic or a week field: Select Assignment. 3. Add a title in the assignment name box and add the assignment details in the description box: 4. Select appropriate for your assignment values in the ...
Students click the assignment link and click "Add submission" (1) Depending on the assignment settings, they either have a text box into which to type their work or an upload area to submit their file (2) They may be able to return to their work and redraft it, or they might have to click a submit button to send in a final version which ...
How to Create an Assignment in Moodle with Ease:In this Moodle course administration short video series you will see how to create assignments in Moodle with...
This video provides a brief explanation of how to create an assignment activity in Moodle. Useful for beginners new to MoodleSee more on our blog at https://...
Using Moodle for assignments is a great way to make assigning, collecting, and grading student work more efficient. An assignment can also be used to remind students of "real-world" assignments they need to complete offline, such as artwork, presentations, and "field" work. In such cases, you can disable all submission types and indicate in the ...
Watch our step by step guide to see how the assignment collapsible comments in Moodle 3.3 works. Assignment collapsible comments. Download Moodle 3.3 or contact a Moodle Partner for upgrading assistance; Download the Moodle 3.3 assignment collapsible comments explainer poster; Read the Moodle 3.3 release notes
This video walks students through how to submit a document using the assignment tool within Moodle 4.0.Thank you,Lance EatonDirector of Digital PedagogyColle...
Adding an Assignment to a Course. Open the Moodle course and turn editing on by sliding the Edit Mode toggle to the on position. (Those using the Classic Theme in Moodle can click the Turn Editing on button.). Move to the section of the course where you wish the assignment to appear and click the Add an activity or resource button.
Use Moodle's wide range of activity modules, like quizzes or assignments, to conduct these final assessments. Course Completion. Moodle has a built-in course completion tracking system that clearly indicates progress. Setting Up Course Completion: Navigate to 'Course Completion' under 'Course Administration.' Here, you can set the ...
Turn Edit Mode on.; Open the relevant section. Select Add an activity or resource.Select Assignment from the Activities tab.; In the General settings, write a meaningful Assignment name.This is the name that will be displayed on the module page and also in the gradebook. In Description, provide clear instructions to your students about the assignment. . Consider adding a link to the student ...
STEP 1: Click on the assignment from the course page. STEP 2: Link your Google Drive account to Moodle. Select the Google account that includes your assignment and click Continue: STEP 3: On the next page, click the blue Open to attach and submit. On the assignment description page that follows, you can add a file from your Google Drive or ...
In Moodle 4.0, assignments have a new area in their settings, called Activity instructions, where teachers can give detailed information about what learners have to do to complete the assignment. The difference with the existing 'description' field is that activity instructions are only visible once learners have started working on the ...
Steps. Open the assignment you want to add groups to. Click Edit settings from the "Assignment administration" menu. In the "Group submissions settings" section, set "Students submit in groups" to Yes to enable group submissions. Set "Require group to make submission" to Yes if you don't want to allow students not in a group to be able to ...
What is the Assignment activity? Assignments allow students to submit work to their teacher for grading. The work may be text typed online or uploaded files of any type the teacher's device can read. Grading may be by simple percentages or custom scales, or more complex rubrics may be used. Students may submit as individuals or in groups.
Moodle has an "assignment" activity that lets students submit assignments electronically and lets instructors grade and provide feedback to the student. Students cannot see each other's assignments, so a wiki, blog, or forum are better choices if you want students to submit work that is to be shared with the class. Set Up. Go to the course and .
Click the Add Submission button, it looks like a sheet of paper. Click on Upload a file, then click Browse. Navigate to the assignment file you created in step 3 above, then select the file and click Open. Click the Upload this file button. You will see your uploaded file within the file submission box. Click on Save changes to continue.
In a much-requested feature, teachers can now have more control over the types of files accepted in assignments, which can help make grading and management much easier. The file submission options include any readable types or can be specific to an assignment submission requirement. Setting this assignment file type restrictions is very simple ...
Go to the course where you want the assignment; turn on the editing, and in the section you want the assignment, click 'Add an activity or resource'. From the Activity chooser, click the Assignment button and click 'Add'. (If you want to edit an existing assignment, click the Edit link to its right and choose the action you wish to take, eg ...
Player Assignments are not something new to EA Sports FC, but there are new demands you can assign your players to fulfill in FC 25.The small change is you can choose left and right short free ...
The assignment module allows teachers to collect work from students, review it and provide feedback including grades. The work a student submits is visible only to the teacher and not to other students. Students can submit any digital content (files), including, for example, word-processed documents, spreadsheets, images, audio and video clips.